|
Corset Guide |
|
|
HOW TO LACE A CORSET |
|
|
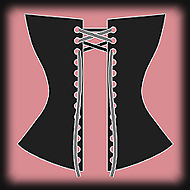
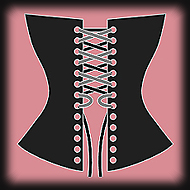
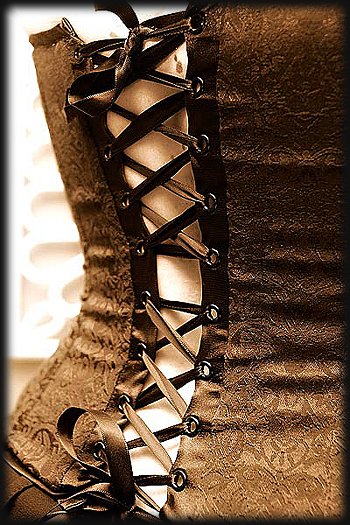
There are several different ways to lace your corset. Below we have provided instructions on our preferred method of lacing a corset. This method uses just one very long lace and reduces wear on the fabric of your corset, transferring the tension of the corset to the lacing ladder and eyelets. It also easier to tighten the corset evenly using this method and gives a better finished look when fully tightenend. Note: The following steps are illustrated as if you were looking at the outside of the corset. |
|
|
|
Step #1 Thread the lace through the top 2 eyelets so that the horizontal lace is on the inside of the corset, as indicated. Make sure the two ends of the lace are even in length. |
|
|
Step #2 Take the lace on the right side and thread it through the next available eyelet on the left, making sure that the lace remains outside the corset until you thread it through the eyelet. Do the same for the left lace. The laces should now form an "X" on the outside of the corset and have passed through to the inside of the corset. |
|
|
Step #3 Again, take the lace on the right side and thread it through the next available eyelet on the left, making sure that the lace remains inside the corset until you thread it through the eyelet. Do the same for the left lace. The laces should now form an "X" on the inside of the corset and have passed through to the outside of the corset. |
|
|
Step #4 Repeat steps 2 and 3 until you reach the waistline of the corset, where we will create the puller loop which is used to tighten the corset once we have finished lacing. The lace must be on the outside of the corset to create the puller loop. |
|
|
Step #5 Take the lace on the right side and thread it through the next available eyelet immediately below on the same side, making sure that the lace remains outside the corset until you thread it through the eyelet, thus forming a loop. Do the same for the left lace. The laces should now have passed through to the inside of the corset. |
|
|
Step #6 Repeat steps 2 and 3 until you reach the bottom of the corset. Adjust the slack in the laces, evenly throughout the length of the corset, so that you have about four inches of slack between the two sides of the corset. |
|
|
Step #7 Tie off the laces at the bottom of the corset, without tightening the corset further. You can use a standard shoelace knot. |
|
|
Step #8 Pull on the puller loops we created in step 5 until the corset is sufficiently tight. Once tightened, fasten the puller loops with a standard shoelace knot. |
|
HOW TO PUT ON A CORSET |
|
|
Just got your first corset but feeling unsure how to put it on? Or youre uncertain if youre getting the best fit? Follow the instructions below to get the best from your corset, including how to avoid some of the common mistakes. |
|
|
Putting a corset on is much easier (and more fun!) with someone else helping you, but it is possible to put your corset on by youself. Make sure that your corset is laced correctly. If youre uncertain then check the Corsets guide to how to lace a corset. Start with your corset very loosely laced at the back - usually you will have 8 inches or more of loose lacing. Wrap it around yourself. If you are putting your corset on by yourself then you will need to hold it up with your arms at your sides. |
|
 |
|
|
Carefully line up the two sides of your busk on the front of the corset - the busk is the pair of metal plates that clip together at the front. Line up the pins and the holes and clip the busk together starting with the second pin and working your was down, than back to the top. If you are putting on a bodice you will likely have lacing or possibly no front fastening at all. Dont worry, just move straight on to the next step! Returning to the back of the corset, its now time to start tightening the lacing. Starting from the top, pull the laces a little tighter then move the loose lace down until it reaches the large loops at the middle of the lacing holes. Next, go to the bottom of the lacing and pull the laces tighter there. Again, work the loose loops of lacing up through the corset to the large loops in the middle. Alternate the above steps, working the top half of the lacing tighter then working the bottom half of the lacing tighter. Do not try to get the sides of the corset to meet! Some doctors have suggested that it could potentially be damaging to have the rigid structure of the corset directly over the vertebrae of the spine. Always leave a minimum of an inch between the sides of the lacing.
|
|
|
Try to keep the sides of the corset roughly parallel. When you are finished lacing the sides should both be vertical with all the lacing connections of equal length. After a few repeats you will find the corset has reached a comfortable point, like being hugged tightly. To begin with, until you are accustomed to wearing corsets, you may want to stop here but if you decide to wear your corset frequently you will find that you are able to tighten the corset further. Again, please do not be tempted to make the sides of the lacing meet over your spine - always leave a small gap. Tie off the loose lacing on the back of your corset. You have a few options of how to do this. A large bow knot looks good, but some people prefer to wrap the loose lacing around their waist once before tying it off at the back. This will make it possible to tie a smaller bow to secure the lacing. If you are wearing the corset out socially then you should tie a double knot. This will make the corset harder to remove at the end of the night, but a single bow can prove to be too tempting for some people! Enjoy wearing your corset! |
|
|
HOW TO AVOID MUFFIN-TOP |
|
|
Muffin-top is a phrase used to describe unsightly rolls of skin above the corset. This most commonly happens when the lacing on the top and bottom of the corset is tightened without adequately working the loose lacing into the middle. Its easy to spot - the holes of the lacing form an eye-shape, far closer together at the top and bottom of the corset than they are in the middle. The effect can be alleviated or minimized by working the lacing so that the lacing holes are in two vertical lines on the back (not two lines that curve to meet together at their ends). Sometimes the muffin-top effect is unavoidable to a degree - the best solution ultimately is to get a made to measure corset that matches your body size perfectly. In the meantime, getting your corsets lacing right will be a big help!
|
|
|
CORSET CARE AND SAFETY |
|
|
Please read each section carefully, as is it very important to properly care for your garment. WEARING YOUR CORSET It is important to always wear something underneath your corset to absorb your body oils and sweat. If your corset is meant to be worn alone, something as simple as a snug tank top with the straps cut off will do quite nicely. You will find dressing easiest if you put your corset on after you have already put on your other undergarments, stockings and shoes. Do not allow other people to wear your corset! By the time your corset is broken in, it has molded to your exact body shape. Letting others wear your corset will warp it as it tries to conform to their shape, and can leave gaps and wrinkles behind. BREAKING IN THE CORSET When you receive your corset, it must be broken in, and broken in correctly. Unlike a pair of new boots, lacing it as tight as you can and running around for a day will harm the corset. Grommets can pop out and seams can weaken, and in some cases even busks can snap. Follow this formula to perfectly break your garment in: Wear something light and comfortable, such as a slip or comfortable cotton shirt, and put your corset on. Make sure to stretch your torso out as you put it on, as this allows your internal organs a chance to settle comfortably. Lace your corset so that it fits snuggly. The tracks of your corset may have strange gapping. This is normal. Make a phone call, fold some laundry, pace back and forth, do something to pass twenty to forty minutes. The goal is move around in the corset, and give it a chance to begin to mold to your body. At this point, you may feel that the corset is loosening. It is okay to lace it a little tighter, now. Wear it for about an other half hour to an hour, and then loosen your laces and take your corset off. Repeat this process two or three times before attempting to wear your corset for more than 4 hours. I would advise bringing a backup garment if your corset begins to disagree with you on longer outings. Even at its tightest, the corset should not be laced in a way that you find stifling or uncomfortable. If you find that you cannot breathe, or begin to experience cramping, loosen the garment and/or take it off. It is likely that it was laced too tightly.Do not wrap the laces around your corset. This will cause undue wear and tear on your waistline. Instead, you can either trim down the cording, if it is too long, or purchase heavy ribbon. Ribbon is nice because it has less bulk, and can be easily tucked inside of the corset.
EATING & MOVEMENT Yes, it is safe to eat and drink while you wear your corset. It is said that one should eat lightly before putting on a corset, avoiding overly heavy foods, to prevent stomach cramping. You may find using the restroom a little on the difficult side. For this, I suggest loosening your laces before sitting down. Remember to bend at your hips, and use your knees to lift. CLEANING Your garment is DRY CLEAN ONLY. This garment must never be submersed in water in any way. The stays are made of metal, and the stays at your hips are made of spiral coils that cannot be coated in protective plastics. After you have worn your corset a few times, you may notice that it has taken on a bit of an odor. It is a good idea to air your corset out by hanging it over the back of a chair, door or cupboard. Its even better with the presence of a circular fan. If there is a bit of a funk, this can be elevated by laying your corset flat, liner side up, and spraying evenly with a mist of Fabreeze once every month or two. You dont want to fully saturate the garment, because that can promote rust of the stays. Just a fine mist will work well. Let the garment dry fully before putting it away. Depending on how often you wear your corset, you will likely want to get your garment dry cleaned at some point. Very few dry cleaners know what to do with corsets. My advice is to ask around to find a reputable dry cleaner, preferably someone who can do it by hand. Make sure they know that there is steel inside of your garment, and that it may not become wet. It may be tempting to use the home dry cleaning bags that you can put in your dryer. Unfortunately, the dryer can warp your stays, so I do not recommend using this method. STORAGE When putting your corset away, it will be tempting to roll it up and toss it in a drawer. Rolling your corset will result in warping, so just dont do it. My favorite way to store a corset is to fold the corset in half at the laces, liner side out. Slide a hanger through the middle of the laces, so that they are moderately evenly distributed on either side. I cover my corsets with a plastic bag or a garment bag. It is also a good idea to include a sachet of lavender or cedar and flax, to absorb moisture away from your garment. Just hang it with your regular clothes in your closet. |
|
|
PARTNERS GUIDE TO LACING SOMEONE UP |
|
|
Start by opening the laces as widely as they can go. Wrap it around the wearer and have her put her hands on her waist like she is telling someone off (not usually hard to do) while the busk is done (the line of fasteners that go down the front of the corset). She should then adjust her breasts to about where she wants them to sit on her chest...It shouldnt take that much moving.
Turn her around and snug the laces down until they are just loose of comfortable from the top down to the middle and the bottom up to the middle. Have the wearer lift her hands up over her head like superman taking off. This moves the floating ribs and diaphragm out of the way and enables her to breathe. Have her hold that position as you tighten the laces from the top down to the Middle and the bottom up to the middle, and have her give a little belly dancer shimmy as you do it...It makes things fall into place more easily through gravity. Once you are done with that,and tie off the laces, she can drop her arms. This should put her breasts in the right place with minor amounts of fluffing the girls. The space in back should not touch. 4-5 inches of spring is typical to have in back to start lacing. Every hour and a half to two hours tighten the corset about a half inch. If she isnt comfortable with that, dont do it. Her body will naturally fall into the corset form and she will know when she should tighten it down. The space in back should be fairly straight. If it looks like an hour glass, there is more stress being put on the waist of the corset, which is fine if you are trying really hard to get into a dress 2 sizes to small, but sucks and does nothing but make the wearer uncomfortable in the garment. |
|


